The author of the Custom Stroke Font extension have some great videos on how to use the tools. Here I just sum up how I use it.
NB for Inkscape v1.0.2 and v1.1
NB: for Inkscape v1.0.2 and v1.1 you will need to do this simple workaround to make the extension work until the Inkscape team have fixed this:
As described in issue#2187 you will need to locate ..\Inkscape\lib\python3.8\site-packages\numpy__init__.py and remove two lines from the file
if sys.platform == "win32" and sys.maxsize > 2**32:
    _win_os_check()
You may need to save in another location, then copy the file back to that folder.
Designing the glyphs
Normally I would start designing my glyphs in a separate document in Inkscape to fiddle around and work on the design. Recently I have invested in a reMarkable tablet and draw a lot of sketches there, exporting to SVG. When the glyphs are close to finished I would make sure they are aligned to the same baseline and start using the template.
Generating the template
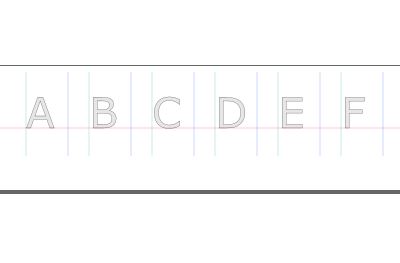
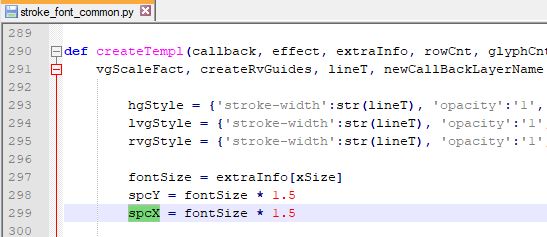
When my glyphs are ready I would open a new, empty file to create the template using the Custom Stroke Font > Create Font Design Template. I have found the glyphs in the template too separated. I have edited the code of stroke_font_common.py to add the vertical guides and the Source Glyphs closer together. Find the createTempl function and spcX, spcY definition. It says fontSize*3 in the original file. I have decreased it to 1.5 which give me less scrolling.
Then I will copy all my glyphs onto the template within the layer “glyphs” and align to the baseline of the template. After that I adjust the x-position to make each glyph be between its vertical guides. Now I would hide or remove the layer with Source Glyphs. Then I spend some time on placing the vertical guide relative to the glyphs to have a good starting point for the kerning.
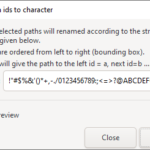
Setting the glyph IDs
Before generating the SVG-font each glyphs need to be within one path and the ID need to be equal to the glyph it is representing. If you have a design of the letter a, the ID of that glyph path need to be ‘a’. It is very helpful to watch the xml editor while working on the glyphs. As I often found myself editing the ID of the glyphs (these IDs are easily lost if you do some kind of editing of the designs) – I created an extension that effectively did this for me. Read about this extension here.
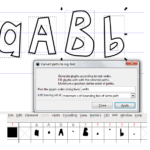
Generating the SVG-font
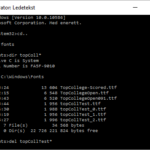
When the Ids are set you can proceed to generate the SVG-font by Custom Stroke Font – Generate font data …
Avoid space in the font name as that might cause trouble when using the SVG-font later on. The SVG-font can now be found in the folder ….\extensions\strokefontdata.
Using the SVG-font
You can use the Custom Stroke Font – Render Text to create text with your new font. I prefer using the Hershey Text extension for that.
And you can take your SVG-font further to FontForge to create f.x. TTF fonts from it where you can work more on the kerning. I will recommend my little script to automate some important steps in FontForge to make the font work well.
More on creating fonts on this blog